
From: https://towardsdatascience.com/deep-learning-based-super-resolution-with-opencv-4fd736678066
Table of Content
- Super Resolution
- Steps to upscale images in OpenCV
- Different pre-trained models
- Samples of results
- Notes and references
Super Resolution in OpenCV
OpenCV is an open-source computer vision library that has an extensive collection of great algorithms. Since one of the latest mergers, OpenCV contains an easy-to-use interface for implementing Super Resolution (SR) based on deep learning methods. The interface contains pre-trained models that can be used for inference very easily and efficiently. In this post, I will explain what it can do and show step-by-step how to use it. So far, it only works with C++.
NOTE: You don’t need any knowledge about SR to use this code. I am running this on an Ubuntu 16.04 machine, but it works for any other distributions.
Steps
- 1. Installing OpenCV with the contrib modules (containing dnn_superres).
- 2. Downloading the pre-trained models.
- 3. Upscaling the image.
- Installing OpenCV with the contrib modules.
Our first step is to install OpenCV. You can follow the instructions from the opencv documentation. It is very important that you also install the contrib modules, because that is where the SR interface code resides. You can choose to install all the contrib modules or just the necessary SR one. The interface or module we will use is called dnn_superres (dnn stands for Deep Neural Network; superres for Super Resolution).
2. Downloading a pre-trained model.
We need to download the pre-trained models separately, because the OpenCV code-base does not contain them. The reason is some of the models are quite big. So if they were in the standard code-base, people who might not need them still would have to download them. There are several models to choose from (see section Models in this article). All of them are implementations of popular SR papers. For now, let’s choose a small model. You can download it here. This pre-trained model can increase the resolution of an image by 2. For more models and their explanations, see section Models in this post.
3. Upscaling the image.
Now we are ready to upscale our own images or even video. Here’s the code in c++:
#include <opencv2/dnn_superres.hpp>
#include <opencv2/imgproc.hpp>
#include <opencv2/highgui.hpp>

using namespace std;
using namespace cv;
using namespace dnn;
using namespace dnn_superres;

int main(int argc, char *argv[])
{
    //Create the module's object
    DnnSuperResImpl sr;

    //Set the image you would like to upscale
    string img_path = "image.png";
    Mat img = cv::imread(img_path);

    //Read the desired model
    string path = "FSRCNN_x2.pb";
    sr.readModel(path);

    //Set the desired model and scale to get correct pre- and post-processing
    sr.setModel("fsrcnn", 2);

    //Upscale
    Mat img_new;
    sr.upsample(img, img_new);
    cv::imwrite( "upscaled.png", img_new);

    return 0;
}
I will explain the important parts of the code.
//Read the desired model
string path = "FSRCNN_x2.pb";
sr.readModel(path);
This loads all the variables of the chosen model and prepares the neural network for inference. The parameter is the path to your downloaded pre-trained model. When you want to use a different model, just download it (see Models section of this article) and update the path.
//Set the desired model and scale to get correct pre- and post-processing
sr.setModel("fsrcnn", 2);
This lets the module know which model you have chosen, so it can choose the correct pre- and post-processing. You have to specify the correct model, because each model uses different processing.
The first parameter is the name of the model. You can choose between: “edsr”, “fsrcnn”, “lapsrn”, “espcn”. It is very important that this model is the correct one for the model you specified in ‘sr.readModel()’. See the Model section on the bottom of the page for the specifications of each model.
The second parameter is the upscaling factor, i.e. how many times you will increase the resolution. Again, this needs to match with your chosen model. Each model will have a separate file for the upscaling factor.
//Upscale
Mat img_new;
sr.upsample(img, img_new);
cv::imwrite( "upscaled.png", img_new);
This is the inference part, which runs your image through the neural network and produces your upscaled image.
Now just compile and run your file to upscale your images!
Models
There are currently 4 different SR models supported in the module. They can all upscale images by a scale of 2, 3 and 4. LapSRN can even upscale by a factor of 8. They differ in accuracy, size and speed.
- EDSR [1]. This is the best performing model. However, it is also the biggest model and therefor has the biggest file size and slowest inference. You can download it here.
- ESPCN [2]. This is a small model with fast and good inference. It can do real-time video upscaling (depending on image size). You can download it here.
- FSRCNN [3]. This is also small model with fast and accurate inference. Can also do real-time video upscaling. You can download it here.
- LapSRN [4]. This is a medium sized model that can upscale by a factor as high as 8. You can download it here.
For more information and implementations of these models see the module’s GitHub README file.
Samples
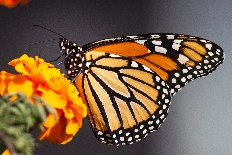


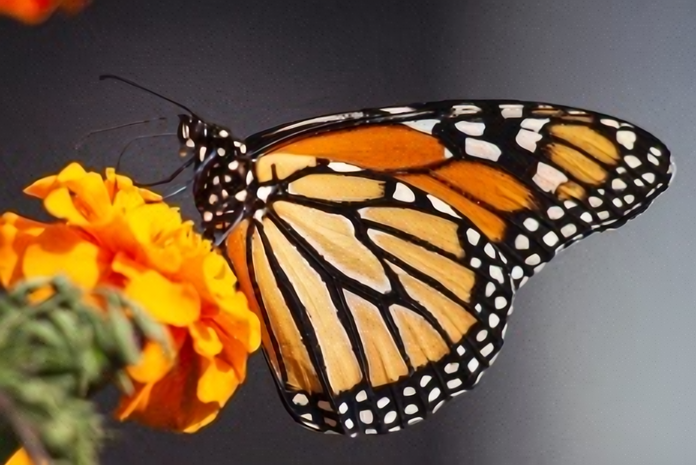

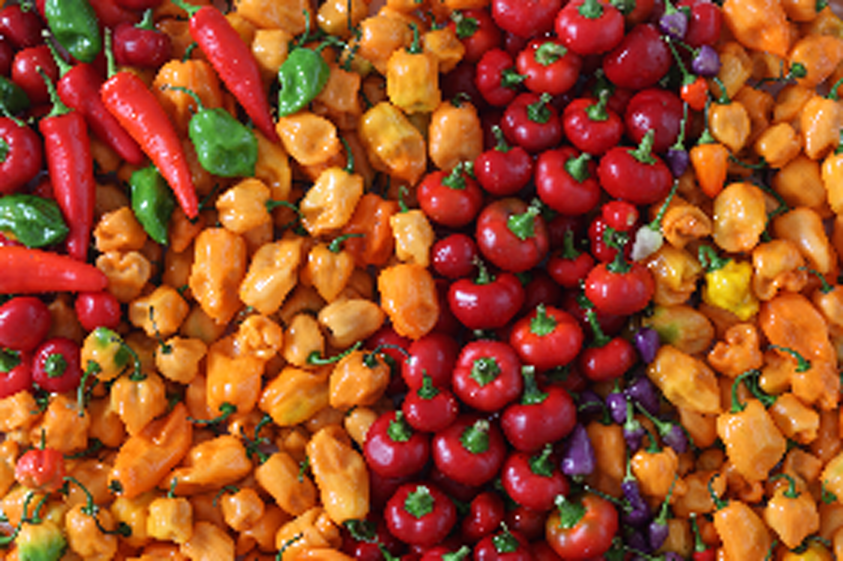
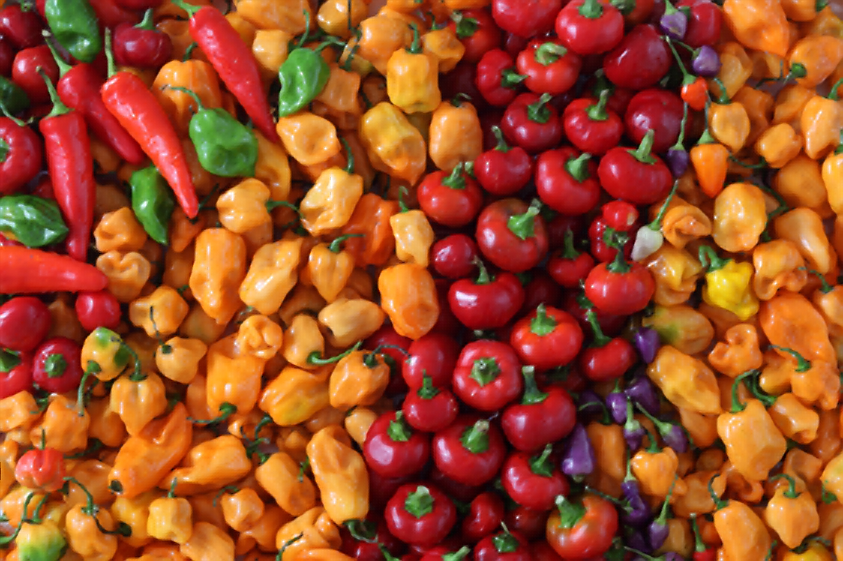


As you can see, the models produce extremely pleasing results that absolutely destroy the performance of simple bilinear interpolation. Especially EDSR gives amazing results, although it is a bit slow (inference of a couple of seconds). Give it a try yourself!
Implementation notes:
- If it gives an error while using .jpg images, try .png format.
- Make sure your setModel() parameters matches with the model you are using in readModel().
- Try different models to get different results in terms of speed and performance.
References
[1] Bee Lim, Sanghyun Son, Heewon Kim, Seungjun Nah, and Kyoung Mu Lee, “Enhanced Deep Residual Networks for Single Image Super-Resolution”, 2nd NTIRE: New Trends in Image Restoration and Enhancement workshop and challenge on image super-resolution in conjunction with CVPR 2017.
[2] Shi, W., Caballero, J., Huszár, F., Totz, J., Aitken, A., Bishop, R., Rueckert, D. and Wang, Z., “Real-Time Single Image and Video Super-Resolution Using an Efficient Sub-Pixel Convolutional Neural Network”, Proceedings of the IEEE conference on computer vision and pattern recognition CVPR 2016.
[3] Chao Dong, Chen Change Loy, Xiaoou Tang. “Accelerating the Super-Resolution Convolutional Neural Network”, in Proceedings of European Conference on Computer Vision ECCV 2016.
[4] Lai, W. S., Huang, J. B., Ahuja, N., and Yang, M. H., “Deep laplacian pyramid networks for fast and accurate super-resolution”, In Proceedings of the IEEE conference on computer vision and pattern recognition CVPR 2017.
